Showing posts with label Guest Post. Show all posts

Monday, November 16, 2015

Guest Post for Very Emily!

Guest Post 
Hey everyone! I did a guest post for the lovely Emily over at her blog Very Emily. I will have a review post up a little later this afternoon but in the meantime, head over there for that nail art post


Friday, August 7, 2015

Guest Post: Jenny of Lavish Layerings


Today's guest post is from Jenny of Lavish Layering:
_______________________________________________________________________

Hi everyone! I'm Jenny from Lavish Layerings (@bostonmerlin10 on Instagram) and I'm so excited to be guest posting for Ida today! Ida is one of my dearest blogger friends and I don't think I would be sane without her! She is always there for me for support, when I need a sounding board, or need to vent about whatever...she's the best! Also...look at dem nails! She is an enabler of all the polishes (she really ignited my love for Elevation Polishes back in the day) and she also does amazing nail art that she rarely shares on her blog, but be sure to check out her Instagram to see her nail art looks.

 
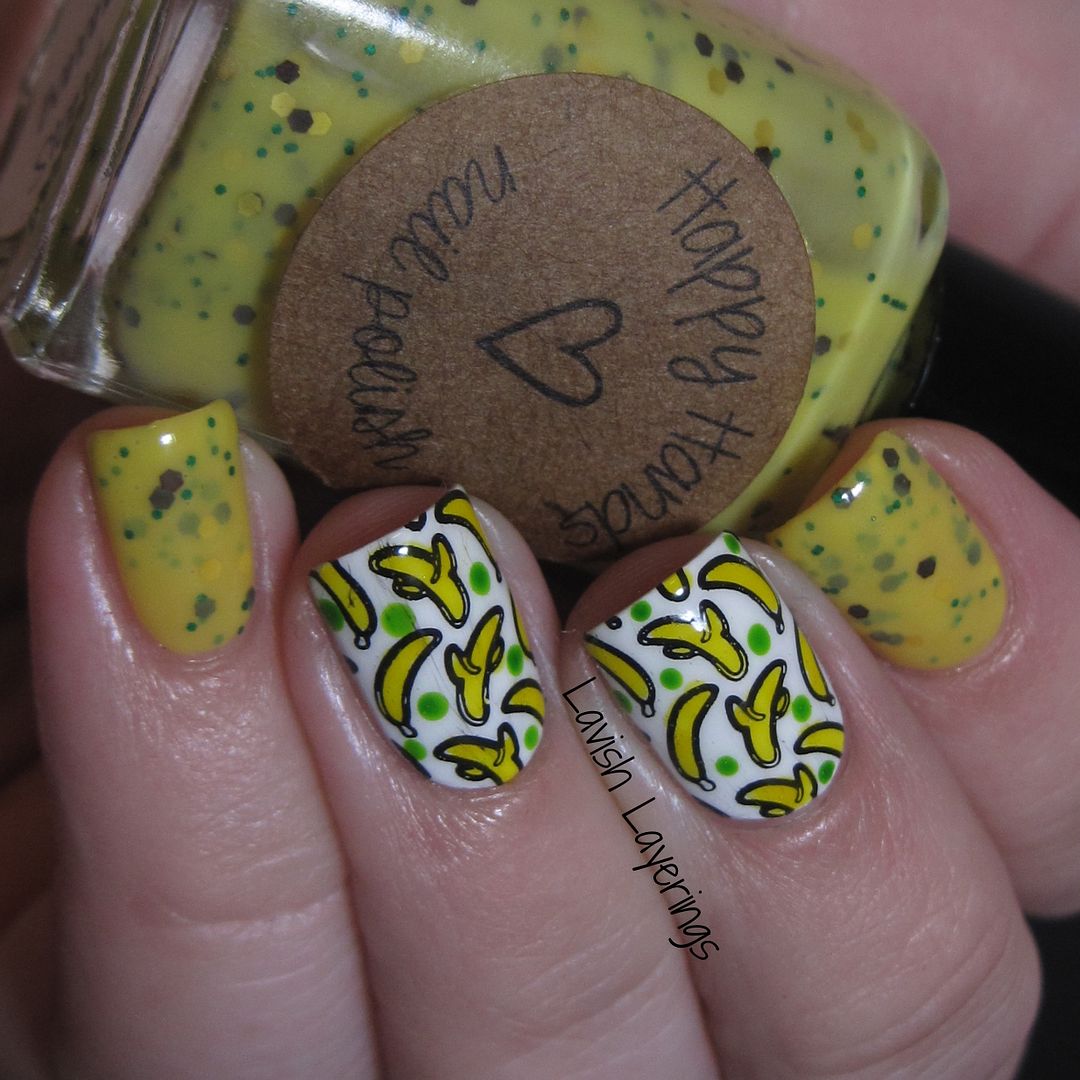
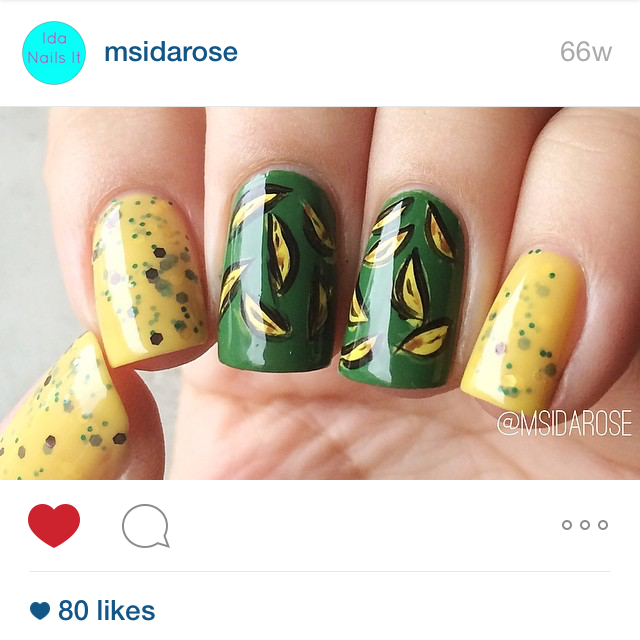
I love the style of Ida's nail art and she often does really cool abstract, geometric, and pop art types of  looks that are very visually striking. One look that she has done a few times are free hand bananas, and I still remember being in love with the very first banana design she did (I did a screenshot of it below), so that was the starting point for my inspiration today. 

The other thing that Ida and I share is similar taste in TV Shows and I still remember her epic post (complete with gifs) on the Happy Hands I've Made a Huge Mistake Collection which was inspired by the show Arrested Development. I had heard of the series before, but Ida's post enticed me to watch it (and buy pretty much all of those polishes) and it quickly became a favorite of mine! So for today's mani, I've got my own twist on Ida's first banana mani.


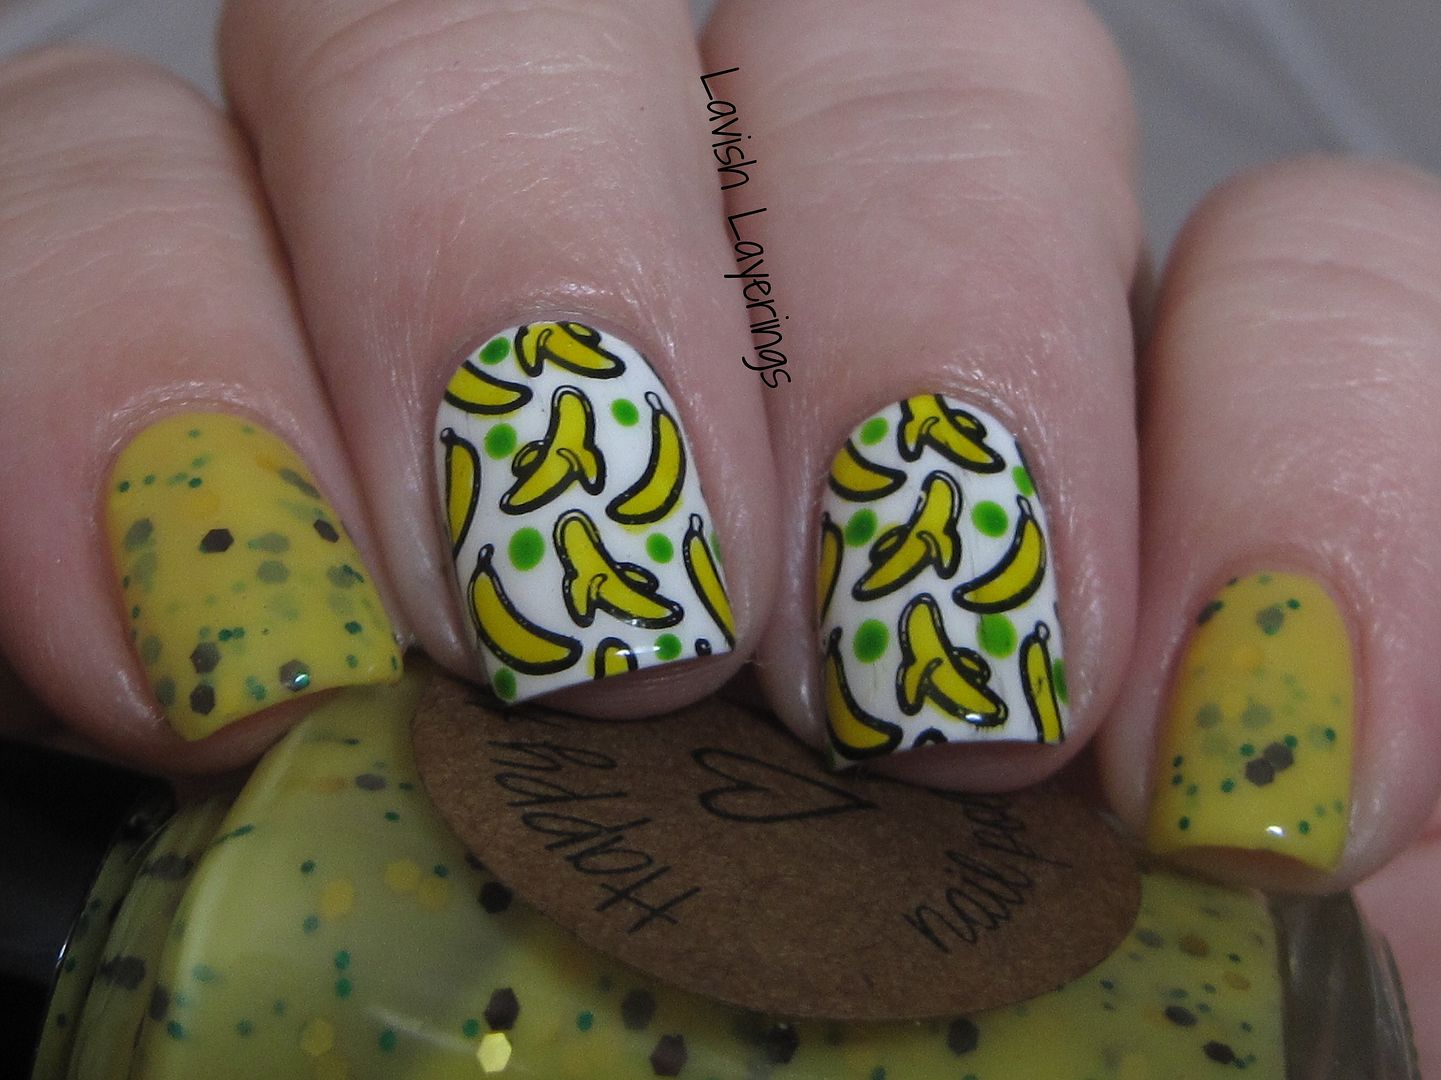
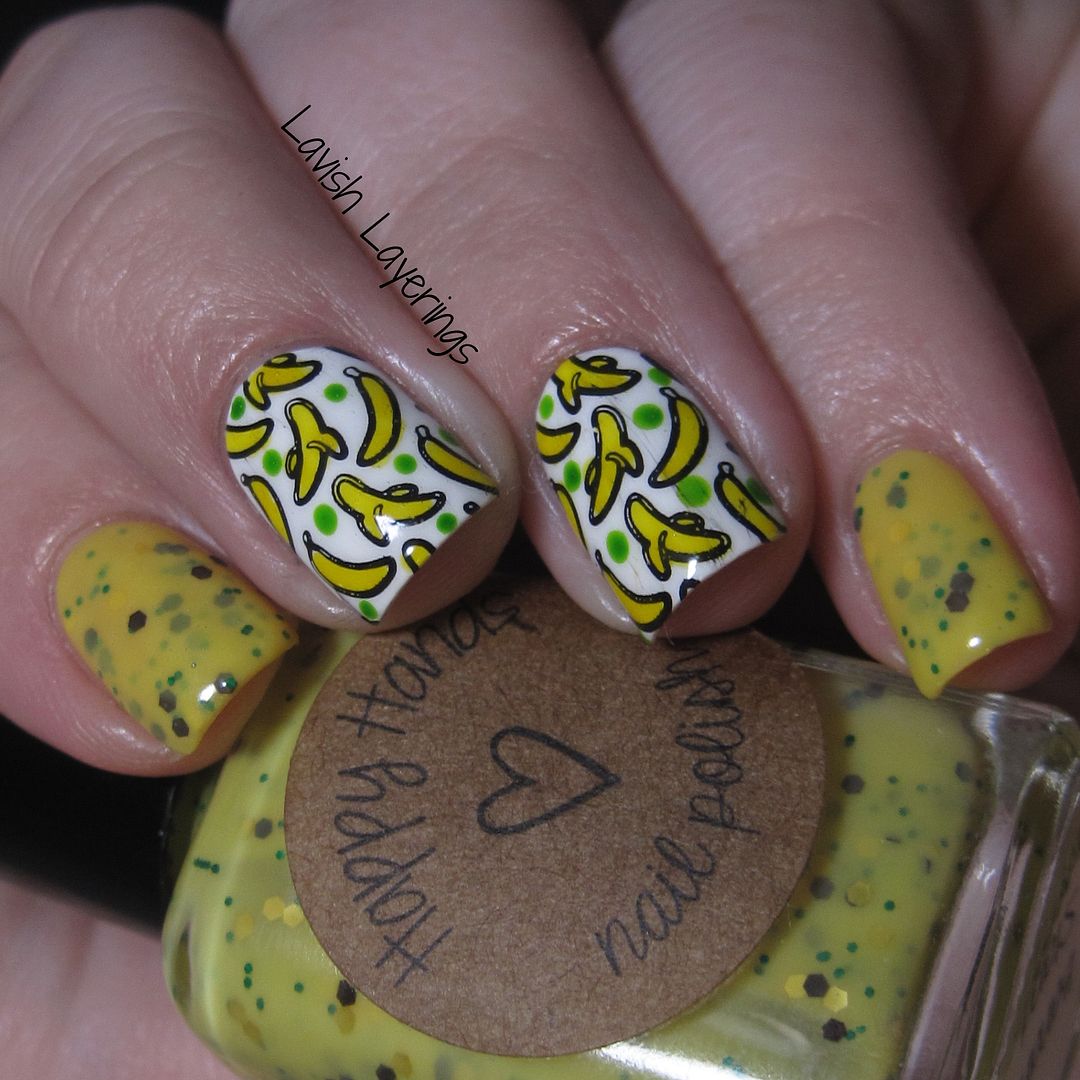
For my mani, I used Happy Hands Banana Stand just like Ida did on all of my nails but the middle nails. For my middle two nails, I started out with a base of KBShimmer Eyes White Open and then stamped with Rica Blackout using a banana image from the Cheeky XL Home Sweet Home plate

At first, I tried my hand at the free hand bananas, but mine looked terrible so I went the stamping route instead. Then I used a dotting tool and filled in the bananas using a yellow jelly (OPI Primarily Yellow). Finally, I had to add some green dots using a green jelly (OPI Landscape Artist) because there is always money in the banana stand. 

Overall, I thought this turned out so cute! Despite my black smearing a little because I got impatient with my topcoat, I loved the pop art look of it and, of course, the reference to Arrested Development.


Again, thank you so much Ida and all of her readers for having me today! <3
_____________________________________________________________________

Oh Jenny. She's really is one of my favorite people, you could say she is my blogger BFF lol. And I LOOOOOOOVE the post she did, she sure knows how to bring the feels for me with this nostalgic blast from the past. Thank you so much Jenny! 

Here are links to Jenny's social media if you would like see more: 


Thursday, August 6, 2015

Guest Post: Emily of Very Emily


Today's guest post is from Emily of Very Emily
___________________________________________________________________

I'm so excited to be guest posting for Ida today! When she asked me I was over the moon! I'm a long time fan of her blog and her perfect swatches so it's a total honor.

A short introduction, my name is Emily, I am currently 23 years old and living in Belgium. I started my blog Very Emily back in January 2010. Blogging for me is a great way to get creative, unwind and escape. It's such a big part of my life and it's given me some incredible friendships over the years. It's always amazing to meet people who share the same passion, such as Ida who is just so sweet and kind! 


Lately I've been seeing texture stamping manicures around quite often which inspired me to try it myself. I have barely looked at my texture polishes recently so I thought adding stamping gave a really nice effect to the look, perfect excuse to get them out! I used China Glaze Itty, Bitty & Gritty as my base from their Texture collection released back in 2013. Then I stamped over it with a baroque/damask print from the plate Hehe 026 using Mundo De Unas stamping polish in the shade Papyrus. No top coat as it's a textured finish I was going for.


I really hope you like these Ida and thank you so much for having me! I also wish you a great vacation and hope you have a nice stay.
___________________________________________________________________

Emily's nail art continuously impresses me how flawless it is and this one is fantastic! Thank you so much Emily for posting today!

If you would like to follow Emily, here are her social media links: 


Wednesday, August 5, 2015

Guest Post: Jenne from Polished Pathology


Today's guest post is from Jenne of Polished Pathology
__________________________________________________________________


Hey guys! I am very excited to be a part of Ida's guests posts while she is on vacation! I got to know her a bit more when we went to Cosmoprof and became blogger buddies. She is an absolutely amazing person, and I'm so glad we are friends! Today I want to utilize a little something different with the neon look. I will be using some faded neons that I swipe gradient with a sponge, then I dab some foil over it to give it a fun twist. Here are the products I used!


Let's get to the step by steps!

Step One:
Use your base coat of choice, followed up by one or two layers of your favorite white, depending on the opacity. My go to white is Wet n Wild Shine in French White Creme, and I used one coat. Because I hate waiting, I suggest using a quick dry top coat to speed up the process. While the white base is drying, use a latex barrier or tape around your nails for ease of cleanup. I used Mini Mani Moo, which you can see around my fingers here:


Step Two:
Swipe colors of your choice on the cosmetic sponge in any pattern. As you can see from the product picture, I used four different colors on my sponge. My favorite sponge to use is Swisspers cosmetic wedges, partially because I accidentally ordered 15 packs of them from Amazon. It was a happy mistake, because they really are quite good. The colors I used were Here I Go, Long Gone, Octopus, and Golden Hair from the Washed Out 2.0 Collection from Bohemian Polish.


Step Three:
Use a craft glue (I like Crafters Pick the Ultimate glue) and brush the glue over your nail using a nail brush or even a cotton swab. Really, you don't have to get fancy with the glue, you could even use elmers glue or mod podge. I just know that I've had the most foil success with Crafters Pic, and I got it at Hobby Lobby in my parents town the last time I was home to visit. Wait two-three minutes for it to slightly dry. Get your piece of nail foil (I suggest cutting off a piece BEFORE you have glue on your hands) and slightly dab it over the nail. Don't press too hard, as more foil will come off. To get this look, light and quick touches are the way to go. I got a giant pack of foil from Born Pretty Store, and just grabbed the plain silver. Wait five more minutes for the glue to dry, seal with your favorite top coat, then peel off your latex barrier! Done and done! :)


Top coat used: Glisten & Glow HK Girl

So, there ya have it! If you recreate this look, tag me on FB or IG so I can see! 

<3

Jenne
___________________________________________________________________

Thank you Jenny for this seriously through and awesome tutorial! If you haven't been following Jenne, you should, here are her social media links: 


Tuesday, August 4, 2015

Guest Post: Dani of From Polish, with Love


Today's guest post is from Dani of From Polish, with Love:
_______________________________________________________________

Oh boy. Am I excited!!! Hi Ida's readers!! My name is Dani and I'm the nails behind the blog From Polish, with Love! Let me tell you.....I am so TICKLED that Ida asked me to do a guest post while she's away. I would be lying if I said I didn't flail my arms and fangirl a bit. I mean, it's Ida. The nails responsible for enabling every indie purchase, like, ever. I know she's enabled me on more than a few occasions.

Speaking of her enabling prowess, the brand and the look behind behind what I'm showing you today is all thanks to her!! I've always drooled over her swatches, especially her Elevation swatches. I knew that if I was going to be doing any nail art, it would be with my Elevation polishes!! The look itself is all thanks to Ida. Way back yonder on her IG she shared this gradient dotticure that she did for her #NOTD and I was smitten!

Here is my recreation!

Gradient-dotticure-nail-art-Elevation-Aguja-St-Exupery

Dotticures freak me out a bit.


I can never get my dots to look right so that's when I knew I wanted to try out a gradient dotticure as they don't have to be uniform!!
I started off with a base of OPI 'Act Your Beige' and decided to add a bit of flair to that with the addition of Elevation Polish 'Aguja St. Exupery' which, if you may not know, is an amazing holo topper filled with flakes. This combo made me feel so fancy! I wish I would have taken a pic before I added the dots because it really was gorgeous.


The polishes I used to create the dots were Elevation 'Lake of the Isles' and 'Theo Wirth Parkway' and OPI 'Cement the Deal'. I decided to veer off a bit and use a different contrast of polishes as I love the 2 Elevations together!!

Gradient-dotticure-nail-art-Elevation-Lake-of-the-Isles

Gradient-dotticure-nail-art-Elevation-Theo-Wirth-Parkway

I really hope I did Ida's manicure justice and thank you for humoring me!!

Thank you again to Ida for having me!
________________________________________________________________


 I must admit, I felt the blushes come on when I saw that she used a look I've done as inspiration. Thank you to Dani for today's post!

Here are links to Dani's social media if you would like to follow her:
Blog
Facebook
Instagram
Pinterest

Monday, August 3, 2015

Guest Post: Ashley of Ashley is PolishAddicted


Today's guest post is from Ashley of Ashley is PolishAddicted
_____________________________________________________________________

Hello! I am Ashley from Ashley is PolishAddicted and I am so pleased to be guest posting for you today! Ida has been one of my favorite bloggers and nail artists for awhile so I was honored when she asked me. I knew I wanted to do some sort of fun nail art because I love looking at Ida's nail art Instagram, especially all of her neon skittles. So, I decided to do some neon skittles of my own!


If you follow me, you know I am a huge fan of spray marbles. They are fun and easy, and sometimes you just want something fun and easy. I used Elevation Polish Cerro Torre 2 topped with Elevation Yeti the Stone Warrior as my base. Once that was dry I protected my skin with Girly Bits Border Patrol. I then used a different Girly Bits neon from the Hoop, There It Is! Collection on each nail. (I will list each polish below.) 


To do the spray marble you set up like you are doing a water marble but only drop one color into the water. Once it spreads, spray it with isopropyl alcohol (I have heard of people using all sorts of things, hairspray, body spray, etc.) and once it separates, dip your finger as you would with a regular water marble. That's all there is to it! Once it was dry I topped it with a quick dry top coat and then with Girly Bits Polish Matte'rs because I do so love a matte finish, especially with neons.


Neons used:
Thumb: I've Got High Hoops
Index: These Hips Don't Lie
Middle: Hip Hoop Hooray!
Ring: Hoop! There It Is
Pinkie: Hooperchondriac 

I hope you enjoyed this post! Have you done any spray marbles? If not, I highly recommend giving it a shot! I love trying different colors and layering different combos, the options are endless. 

Thank you again to Ida for having me share my love of polish with her lovely readers! 
______________________________________________________________

Thank you Ashley for posting today. Neon skittles are definitely something I love to do and I think hers look great!

Here are Ashley's social media links if you want to follow her: 

Friday, July 31, 2015

Guest Post: Savannah of Addicted to Polish


Today's guest post is from Savannah of Addicted to Polish
__________________________________________________________________

Hi everyone! I'm Savannah and I blog over at Addicted to Polish.  I'm a long time reader of Ida Nails It and I'm so excited to be guest posting for Ida.  I've bought way more polish than I'd like to admit because of her.

I'm always admiring Ida's nail art that she posts over on her Instagram and I rarely get a chance to do any (it also happens to be my birthday weekend), so today I'm embracing my creative side and doing a little nail art.


For this look I used:

China Glaze Snow
China Glaze Thistle Do Nicely
China Glaze Home Sweet House Music
KBShimmer Rum Me the Right Way 
Orly Shine
Tape
Striper Brush
Makeup Sponge
Quick Dry Top Coat

First I applied China Glaze Snow my quick dry and waited for it to dry. Making sure everything is dry is important.  If you don't, you'll end up with a disaster.  I know from experience.  After everything is dry I applied tape over the nail so there is only a strip in the middle that isn't covered.  With the make up sponge I used Thistle Do Nicely, Home Sweet House Music and Rum Me the Right way to sponge a gradient on the nail.  Remove the tape, and using the striper brush line the sides with Shine.  Top coat it and you're done!


Many thanks to Ida for having my on her blog!
_____________________________________________________________________

OMG, how fantastic is this look?! Savannah did a wonderful post. If you would like to follow her, here are her social media links: 


Thursday, July 30, 2015

Guest Post: Deborah of Love Varnish


Today's guest post is from Deborah of Love Varnish
_______________________________________________________________

Hi everyone! My name is Deborah and I am one of the bloggers from Love Varnish. When Ida asked me to guestpost for her, I just had to take her up on the offer. Ida has been one of my favorite blogs for a while now, because of her beautiful daylight shots and lovely nails. And well, she has a nack of convincing me I need all the Pahlish she shows ;-). My wallet doesn't like Ida as much, lol!

For todays post I decided to do some fun floral nail art. Ida and I are both part of a Facebook group that recently joined forces by all posting something with the same theme and that was floral. Normally I am not a freehand nail art type of gal but I got inspired and so this second floral look was born! It actually makes use of a tutorial published in the book Idiot's Guide: Nail Art written by Emily Draher, another beloved member of our Facebook group <3. 


I started out by painting all nails except my middle and index finger with 2 coats of Cirque Colors Nympho, part of the Vice Collection. This squishy pink neon has an amazing formula and it applied like butter. The 2 naked nails were covered with 2 coats of Cirque Colors Carpe Diem. I let the white polish dry for a bit and then used the polish brush of Nympho to create a few splotches of color along the sides of my nails. No need to be precise or perfect. just make sure some space is left between the edges of the splotches so you have room to create your leaves.

Using a trimmed down detail brush and Cirque Colors Memento Mori, I created the flower petals. Again, no need to be perfect, the imperfections are what make this design dynamic and interesting. With a dotting tool I filled in some white space and finished with topcoat for a shiny result. 


Don't they look great? I wore these for 2 days straight and had some nice compliments on them - people were so surprised to hear these were hand painted. They even looked nice on Cindy, the dominant hand ;-). 


Ida, thanks again for having me over! I had a real fun time creating these for you :-).

_________________________________________________________________________

I love the pretty and bright floral design that Deborah went with. And you most definitely need to be following her, her social media links are: